
Sweet Serenity: Crafting Irresistible Homemade Caramel bites
There is a unique magic that lingers in the air when you step into a kitchen filled with the warm, buttery aroma of caramel simmering on the stove. It’s a scent that whispers of nostalgia-reminding us of childhood candies nestled in crinkly wrappers and the joyful indulgence of savoring each sweet morsel. In “Sweet Serenity: Crafting Irresistible Homemade Caramel Bites,” we invite you on a delightful culinary journey, where a few simple ingredients transform into velvety treasures that melt in your mouth. Whether you’re a seasoned confectioner or a curious beginner, this guide will illuminate the art of caramel making-sharing tips, techniques, and heartfelt stories along the way. Get ready to unleash your inner chocolatier and create sumptuous caramel bites that are not only a treat for the taste buds but also a source of joy and connection with loved ones. So, tie on your apron, gather your supplies, and let’s embark on a sweet adventure that promises to envelop your senses in pure delight!
Sweet Serenity: Crafting irresistible Homemade Caramel Bites
Creating homemade caramel bites is a delightful journey into the world of confectionery. Whether you’re indulging in a rich personal tradition or seeking to impress your loved ones with a sweet gesture, mastering the art of caramel making unlocks endless flavor possibilities. This guide dives into essential ingredients and techniques, helping you craft sweet serenity that elevates any dessert table.
Prep and Cook Time
- Prep time: 15 minutes
- Cook Time: 20 minutes
- Cooling Time: 1 hour
Yield
Approximately 24 caramel bites.
Difficulty Level
Medium
Ingredients
- 1 cup granulated sugar
- 6 tablespoons unsalted butter, cut into pieces
- 1/2 cup heavy cream, at room temperature
- 1/4 teaspoon sea salt
- 1 teaspoon pure vanilla extract
- Optional flavorings (e.g., espresso powder, sea salt flakes, or citrus zest)
Instructions
- In a medium-sized heavy-bottom saucepan, combine the granulated sugar over medium heat. Stir constantly with a wooden spoon or heat-resistant spatula.
- Once the sugar begins to melt, continue stirring until it transforms into a smooth, amber-colored liquid, ensuring there are no sugar clumps.
- Slowly add the unsalted butter to the melted sugar, stirring continuously until it is fully incorporated and begins to bubble.
- Gradually pour in the heavy cream, stirring until the mixture is combined and no lumps remain. This will cause the mixture to bubble vigorously; caution is advised.
- Add in the sea salt and vanilla extract, stirring for another minute to integrate the flavors.
- Remove the saucepan from heat and let cool slightly. If you’re infusing your caramel with unique flavors, this is the moment to add in your chosen ingredients!
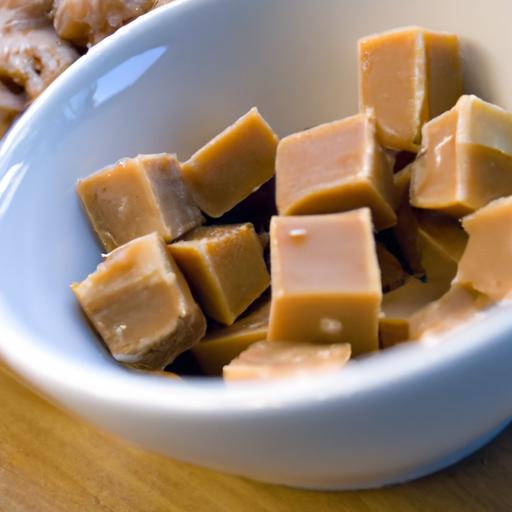
- Pour the caramel into a greased 9×9 inch baking dish or silicone molds to create individual bites. Allow it to cool completely on the counter before transferring it to the refrigerator.
- Once chilled and hardened (about one hour), cut or pop your caramel out of the molds, and they’re ready to enjoy!
Chef’s Notes
For a delightful twist, consider adding a pinch of espresso powder to deepen the flavor. You can also substitute flavored extracts, like almond or mint, for the vanilla. When storing, keep your caramel bites in an airtight container at room temperature. If they get too soft, briefly chilling them can help maintain their shape.
Perfecting Flavor Profiles: Infusing Your Caramel with Unique Twists
Experimenting with flavors is what makes homemade caramel notably exciting. consider adding citrus zest for a refreshing twist or using infused herbs like rosemary for an adventurous profile. Try drizzling a hint of honey for a floral note, or mix in a few grains of espresso for indulgent coffee flavors. Remember, the key to flavoring is subtlety; a little can go a long way!
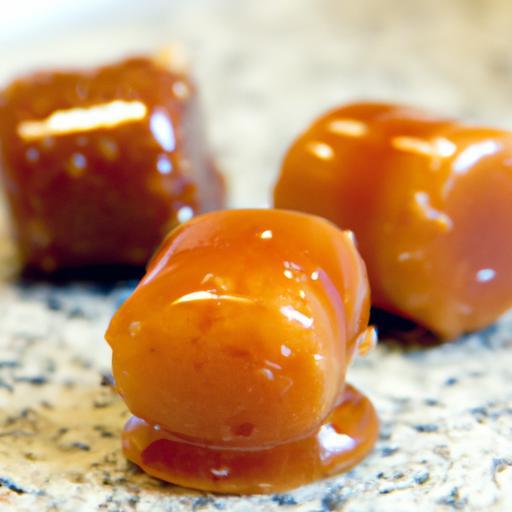
Molding Magic: Tips for Shaping and Storing Your Caramel Bites
For beautiful caramel shapes, use molds made from silicone, as they allow easy removal without sticking. If using a baking pan, generously grease it before pouring in your caramel. After cutting into pieces, wrap each caramel bite in wax paper or cellophane to keep them fresh and soft. This will also make them a charming gift option!
Elevating Your Treats: Pairing Suggestions and Presentation Ideas
Served alone, these delightful caramel bites can turn heads, but when paired with other flavors, they can create a culinary masterpiece. Consider serving them alongside a dark chocolate ganache for dipping or alongside fresh fruits like apples or pears for contrast. Plating can be elevated by drizzling a bit of melted chocolate atop the caramel bites, or garnishing with a sprig of mint for that professional touch.
| Nutritional Facts | Per Serving (1 caramel) |
|---|---|
| Calories | 60 |
| Protein | 0g |
| Carbs | 12g |
| Fat | 2g |
Mastering the craft of caramel making leads to sweet serenity in your dessert repertoire. The joy of creating your own homemade caramel bites lies not just in the finished product, but in the rich experience of experimentation and flavor exploration. Happy cooking!
Q&A
Q&A: Sweet Serenity – Crafting Irresistible Homemade Caramel Bites
Q1: What makes homemade caramel bites special compared to store-bought options?
A1: Homemade caramel bites exude a warmth and authenticity that store-bought candies often lack. When you craft these little nuggets of joy at home, you have total control over the ingredients, allowing you to create a treat that is not only appetizing but also free from unwanted preservatives and artificial flavors. Plus, there’s an unbeatable satisfaction that comes with making something sweet from scratch that may just elevate your mood!
Q2: What ingredients will I need to get started on these caramel bites?
A2: To whip up your divine caramel bites, you’ll need a handful of essential ingredients: sugar, unsalted butter, heavy cream, corn syrup, and a pinch of salt. Optional ingredients such as vanilla extract and sea salt for sprinkling can elevate their flavor and add a gourmet touch. Remember, quality matters, so opt for the best butter and cream you can find-you’ll taste the difference!
Q3: Are caramel bites challenging to make? What should a beginner be aware of?
A3: While making caramel can seem intimidating, it’s quite accessible with a little patience and practice! The key is to maintain a steady heat and stir consistently to ensure an even melting and prevent scorching. A candy thermometer is your best friend here, helping you achieve the perfect soft-ball stage, typically around 240°F (115°C). Don’t be discouraged by the first try-every batch will bring you one step closer to caramel perfection!
Q4: Can I customize my caramel bites?
A4: Absolutely! The world of caramel is your oyster. You can infuse flavors like espresso, bourbon, or toasty nuts to create unique profiles that suit your taste. By adding chocolate coating, outlined patterns, or sprinkles, you can fashion a confection that not only delights the palate but also dazzles the eyes. Experimentation is encouraged-who knows what delicious discoveries await you?
Q5: What tips can you share for achieving the perfect texture?
A5: A perfectly chewy caramel has a delicate balance between firmness and softness. to achieve this, pay attention to your heating process: cook the mixture to the specified temperature without rushing it. Also, allow the caramel to rest at room temperature before cutting it into bites-this helps it to set up properly and ensures a delightful mouthfeel. A light dusting of cornstarch or powdered sugar as you cut can also help prevent your bites from sticking together.
Q6: How should I store my homemade caramel bites?
A6: storage is key to maintaining the lusciousness of your caramel bites. Keep them in an airtight container at room temperature for up to two weeks. If you anticipate longer storage, you can refrigerate them, but make sure to individually wrap each one in wax paper to keep them fresh and prevent them from sticking together. Allow them to come to room temperature before enjoying for the best texture.
Q7: What is the best way to serve these caramel bites?
A7: Serving your caramel bites can be as fun as making them! Present them on a decorative platter or in small jars for a delightful gift. Pair them with a rich dark coffee or herbal tea. They also make a fantastic addition to dessert platters or can be used as a topping for ice creams or other desserts-let your creativity run wild!
Q8: Where can I find more tips and tricks for making caramel?
A8: For further caramel explorations, numerous online cooking blogs and YouTube channels focus entirely on candy-making techniques. You can also check out social media platforms where home bakers share their experiences and recipes. Joining food forums or communities can provide valuable insights and troubleshooting tips from fellow caramel enthusiasts.
Stay sweet, and may your kitchen be filled with the indulgent aroma of homemade caramel!
Insights and Conclusions
As we wrap up our delightful journey into the world of homemade caramel bites, it’s clear that this sweet treat is much more than just a sugar fix; it’s a celebration of creativity and comfort. With each batch crafted, you’re not just making confections but also memories to share with loved ones, delighting their taste buds and warming their hearts.
Embrace the process, and don’t shy away from experimenting with flavors and presentations. Whether you’re drizzling a touch of sea salt on top, mixing in hints of vanilla, or infusing unique spices, your caramel bites can be as unique as you are.
So, gather your ingredients, don your apron, and let the scent of sweet caramel fill your kitchen. remember, with a little patience and creativity, you can conjure up a taste of sweet serenity that will leave everyone asking for ‘just one more.’ Happy crafting, sweet makers!