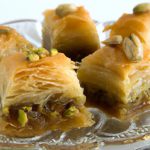

Deliciously Easy: Gluten-Free Bread Machine Recipes Unleashed
In a world where culinary creativity meets dietary necessity,the quest for delicious,gluten-free bread has never been easier-or more rewarding. Enter the magical realm of gluten-free bread machines, where the warm embrace of freshly baked bread awaits at the push of a button. Whether you’re a seasoned bread-maker or a kitchen novice, the allure of hot, fragrant loaves tailored to your dietary needs is captivating. In this article,we’re on a journey to explore the art and science behind gluten-free baking,revealing a treasure trove of simple yet satisfying recipes that will have you saying goodbye to store-bought alternatives. With the right ingredients and our easy-to-follow instructions, you’ll unleash your inner baker and fill your home with the irresistible aroma of homemade bread. so, gather your favorite grains, dust off that bread machine, and prepare to awaken your taste buds with a collection of recipes designed not only to satisfy but to inspire!
Exploring the Benefits of Gluten-Free Bread Making at Home
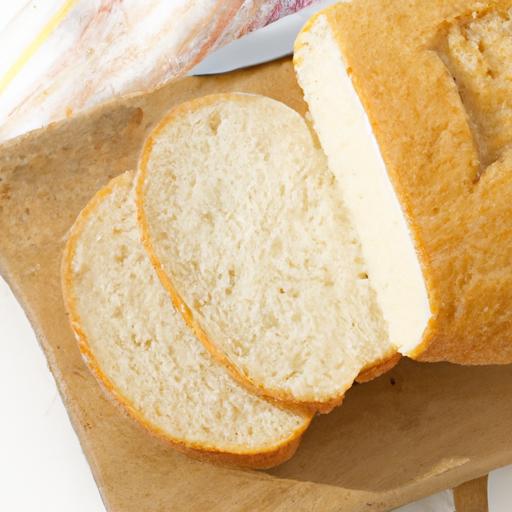
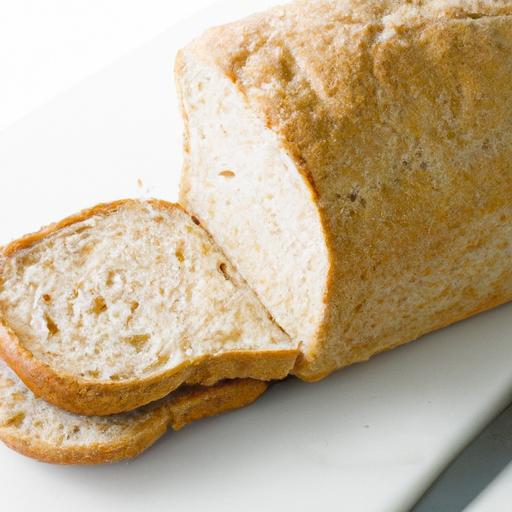
Deliciously easy gluten-free bread machine recipes offer a delightful way to explore the world of gluten-free baking right from your kitchen. Whether you are gluten intolerant or simply seeking healthier options, baking your own gluten-free bread at home is both satisfying and beneficial. Not only do you gain control over ingredients, ensuring freshness and quality, but you also avoid preservatives and additives often found in store-bought alternatives. Each loaf you craft can be tailored to your tastes, allowing for a burst of flavors and textures unique to your culinary desires.
Prep and Cook Time
- Prep Time: 15 minutes
- Cook Time: 2 hours
- total time: 2 hours 15 minutes
Yield
1 2-pound loaf
Difficulty Level
Easy
Ingredients
- 2 cups gluten-free all-purpose flour
- 1/2 cup tapioca flour
- 1/4 cup almond flour
- 1 tablespoon baking powder
- 1 teaspoon salt
- 1 tablespoon sugar or honey
- 1 1/2 cups warm water (110°F)
- 1/4 cup vegetable oil
- 2 teaspoons apple cider vinegar
- 2 teaspoons instant yeast
Instructions
- In a mixing bowl, combine the gluten-free all-purpose flour, tapioca flour, almond flour, baking powder, salt, and sugar. Whisk thoroughly to ensure even distribution of dry ingredients.
- In a separate container, combine the warm water, vegetable oil, apple cider vinegar, and instant yeast. Let the mixture sit for about 5 minutes until it becomes frothy.
- Pour the wet ingredients into the dry ingredients and mix until fully combined. The batter will be thicker than conventional bread dough.
- Transfer the batter into your bread machine, ensuring the pan is properly fitted.
- Select the gluten-free setting on your bread machine, set the crust preference if applicable, and start the process. The machine will handle kneading and baking, ensuring success.
- Once the cycle is complete, carefully remove the bread from the pan and allow it to cool on a rack before slicing.
Chef’s Notes
For a more flavorful twist, consider adding seeds, herbs, or spices to the dough. Chia seeds or sunflower seeds add crunch, while rosemary or garlic powder can impart savory notes. If your bread seems too dense, gently increase the water next time or add an extra 1/4 teaspoon of instant yeast to encourage better rise.
Serving Suggestions
Serve the freshly baked gluten-free loaf warm, sliced and spread with dairy-free butter or your favorite jam. For a heartier meal, top slices with avocado, fresh tomatoes, and a sprinkle of sea salt. Pair with soups or salads for a complete experience.
| Nutritional Data | Per Slice |
|---|---|
| Calories | 150 |
| Protein | 4g |
| Carbohydrates | 25g |
| Fat | 6g |
Essential Techniques for Perfecting Your Gluten-Free Loaf
Mastering gluten-free bread baking at home also involves understanding essential techniques that differ from traditional bread making. Pay close attention to measuring your flours accurately, as even a slight variation can impact the texture. Consider sieving your flours to aerate them or using a kitchen scale for precision. Additionally, allow your dough to rise in warm, draft-free locations to achieve the best results.
Top Ingredient Swaps for Flavorful Gluten-Free Bread Variations
To create variations of your gluten-free bread, explore ingredient swaps like replacing almond flour with coconut flour for a sweeter flavor profile. You can introduce flaxseed meal to enhance the nutritional content and provide a subtle nuttiness. If you’re looking to replicate the texture commonly found in gluten-containing breads, consider adding guar gum or psyllium husk as binding agents.
Tips for Troubleshooting Common Gluten-Free Bread Issues
If your bread comes out denser than desired, it might not have risen well due to inactive yeast or too little moisture. Always check the expiration dates on your yeast and ensure your water temperature is warm enough to activate it. Conversely, if your bread is too crumbly, you may be missing a binding agent, which can be resolved with added eggs or a flaxseed meal mixture.
Q&A
Q&A: Deliciously Easy Gluten-Free Bread Machine recipes Unleashed
Q1: What makes gluten-free bread machine recipes a go-to for home bakers?
A1: gluten-free bread machine recipes are a delightful solution for anyone seeking the joy of homemade bread without the complexities of traditional baking.Bread machines streamline the process, allowing you to mix, knead, and bake with minimal effort. Plus, gluten-free flours require different handling, and a bread machine takes the guesswork out of achieving the perfect texture, resulting in delicious loaves that rise beautifully and taste fantastic!
Q2: Can I use standard wheat flour recipes in a gluten-free bread machine?
A2: Not at all! Standard wheat flour recipes rely on gluten to provide structure and elasticity, which gluten-free flours simply do not possess. instead, gluten-free recipes typically utilize a blend of flours such as almond, coconut, or rice flour, often combined with binding agents like xanthan gum or psyllium husk. Each blend brings its own flavor and texture, allowing you to experiment and discover your favorites!
Q3: What are the must-have ingredients for gluten-free bread machine baking?
A3: Stocking your pantry with gluten-free staples is essential. Consider investing in:
- Gluten-Free Flours: Almond, coconut, brown rice, and oat flour are great options.
- Binding Agents: Xanthan gum or psyllium husk helps mimic gluten’s structure.
- Leavening Agents: Baking powder and baking soda provide lift.
- Liquid Ingredients: Almond milk,coconut milk,or even water can work wonders.
- Sweeteners: Honey, maple syrup, or coconut sugar can lend sweetness and moisture.
With these key ingredients, you’ll be set to explore a kaleidoscope of flavors!
Q4: What are some creative flavor additions to enhance gluten-free bread?
A4: The beauty of gluten-free bread is the chance to infuse flavors! Here are some tantalizing ideas:
- Olive Oil and Herbs: For a Mediterranean touch, try adding olive oil and chopped rosemary or garlic.
- Sun-Dried Tomatoes: Incorporate these for a burst of umami and richness.
- Seeds and Nuts: Flaxseeds,sunflower seeds,or walnuts can add crunch and nutrition.
- Spices: Cinnamon or nutmeg can turn your bread into a sweet comfort food.
- Fruits: Dried cranberries or chopped apples bring a wonderful moistness and sweetness.
Experimenting with these additions can help you create a personalized loaf that tantalizes your taste buds!
Q5: How do I ensure my gluten-free bread rises properly in the machine?
A5: Achieving the perfect rise in gluten-free bread can be a bit tricky, but here are some tips to help you succeed:
- Check Your Ingredients: Ensure that your gluten-free flours are fresh. Stale or expired ingredients can hinder the rise.
- Warm the Liquids: Using slightly warm liquids helps activate the yeast effectively.
- proper Measurements: use a kitchen scale for accurate measurements, as gluten-free baking can be sensitive to ratios.
- Let it rest: Most gluten-free bread recipes benefit from a resting period before baking, allowing the flour to absorb moisture fully.
Following these tips will help you achieve a beautifully risen and fluffy loaf!
Q6: Can gluten-free bread be stored, and if so, how?
A6: Absolutely! proper storage is key to extending the shelf life of your homemade gluten-free bread. Here are the best practices:
- Room Temperature: Allow the bread to cool fully before slicing. Store it in an airtight container at room temperature for up to 3 days.
- Freezing: For longer storage, wrap the bread tightly in plastic wrap and then in aluminum foil before placing it in the freezer. It can maintain its quality for up to 3 months. Simply thaw at room temperature; toast or warm slices for the best taste!
With these storage tips, you can enjoy your homemade gluten-free bread well beyond baking day!
Q7: any advice for beginners trying out gluten-free bread machine recipes?
A7: Absolutely! here are a few kind tips for the novice bakers:
- Start Simple: Choose straightforward recipes with fewer ingredients as you become familiar with gluten-free baking.
- Follow Recipes Closely: precision is crucial in gluten-free baking, so stick to the recommended ratios and instructions.
- Document Your Results: Keep track of what works and what doesn’t. Adjustments can lead to delightful discoveries!
- Embrace the Learning Curve: Don’t be discouraged by initial mishaps. Every loaf is a step towards mastering the art of gluten-free baking.
Happy baking, and may your gluten-free journey be as delicious as it is rewarding!
Final Thoughts
as we reach the end of our culinary journey through “deliciously Easy: Gluten-Free Bread Machine Recipes Unleashed,” we hope you’ve found inspiration and confidence to embrace the world of gluten-free baking.
Imagine the warm aroma of freshly baked bread wafting through your kitchen, the crispy crust giving way to a soft, fluffy interior with every slice. With the help of your trusty bread machine, you can create mouthwatering loaves that are not just gluten-free, but also filled with flavor and nourishment. No longer should dietary restrictions limit your enjoyment of homemade bread; instead, let them inspire your creativity.
From savory herb-infused loaves to sweet cinnamon-raisin delights, our collection of recipes has equipped you with the tools to make every meal a celebration. Remember, baking is as much about the journey as it is indeed about the destination. Each batch you create is a step towards discovering your unique taste preferences and the joy of baking.
So dust off that bread machine, gather your gluten-free ingredients, and get ready to unleash your inner artisan baker. Happy baking, and may your bread always rise to perfection!