
Master the Art of Laminated Dough: A Step-by-Step Guide
Imagine the heavenly aroma of fresh-baked pastries wafting through your kitchen, the golden layers of buttery dough flaking apart with each bite to reveal rich, indulgent flavors. Laminated dough is the unsung hero behind these culinary delights, transforming humble ingredients into flaky masterpieces that elevate any brunch or dessert table. Whether you’re dreaming of buttery croissants, delicate puff pastries, or indulgent Danish pastries, mastering the art of laminated dough is within your reach.
In this complete step-by-step guide, we’ll unravel the secrets of this ancient baking technique that has dazzled pastry lovers for centuries. From understanding the science behind lamination to perfecting the folding techniques that create those enviable layers, we will equip you with all the essential tools and tips you’ll need to embark on your pastry-making journey. Get ready to don your apron, roll up your sleeves, and immerse yourself in the satisfying world of laminated dough, where every fold brings you closer to pastry perfection!
Master the Art of Laminated Dough: A Step-by-Step guide
Understanding laminated dough is essential for any ambitious baker or culinary enthusiast wishing to elevate their baking repertoire. This intricate technique creates gorgeous flaky layers in pastries like croissants and puff pastry, offering a delightful texture and mouthwatering appearance.Delving into the world of laminated dough not only enhances your baking skills but also opens the door to a myriad of appetizing possibilities, transforming an ordinary treat into an extraordinary experience.
Prep and Cook Time
Prep Time: 30 minutes (excluding resting time)
Cook Time: 20-25 minutes
Total Time: Approximately 7 hours (including chilling time)
Yield
Makes about 12 pastries (varies based on size and shape)
Difficulty Level
Advanced
Essential Ingredients for perfecting Your Laminated Dough
- 3 cups all-purpose flour, sifted
- 1 1/4 tsp fine sea salt
- 1 tbsp sugar
- 1 1/4 cups unsalted butter, chilled and cut into thick slices
- 1 cup cold water
- 1 tsp apple cider vinegar (optional, for improved dough elasticity)
- 1 large egg (for egg wash, optional)
Techniques for achieving Flaky Layers and Texture
- In a large mixing bowl, combine the flour, salt, and sugar. Whisk together until well blended.
- Add the cold water and apple cider vinegar (if using) to the dry ingredients. Stir until the mixture forms a shaggy dough.
- Turn the dough out onto a lightly floured surface and knead gently for about 1 minute, just until combined.
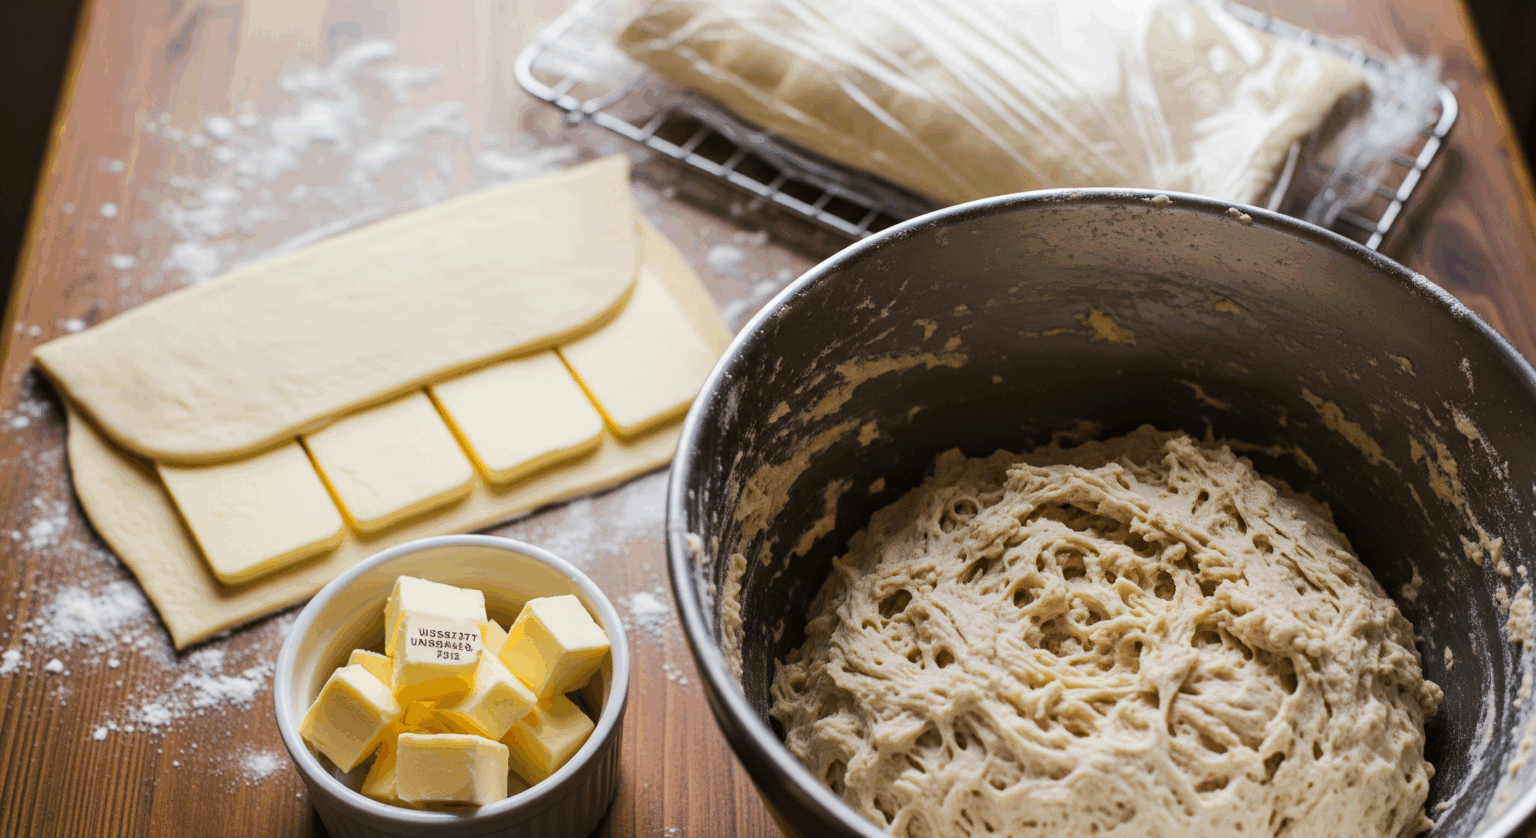
- Shape the dough into a rectangle, wrap it in plastic wrap, and refrigerate for at least 2 hours (or overnight) to allow the gluten to relax.
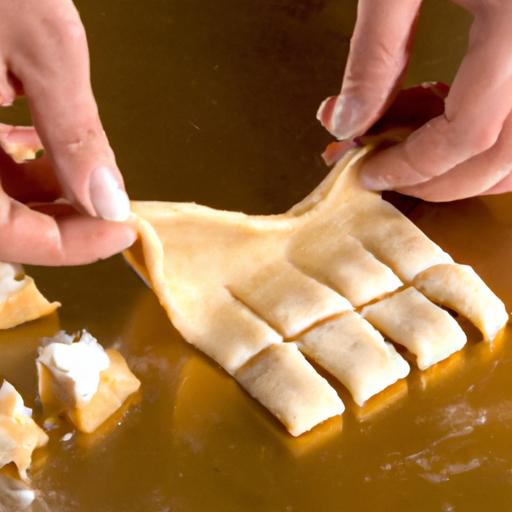
- After chilling, roll out the dough into a rectangle about 1/2 inch thick. Place the unsalted butter slices in the center, folding the edges of the dough over the butter like an envelope.
- Roll out the dough again to a rectangle, then fold it in thirds like a letter (this is called the frist turn).
- Wrap the dough and refrigerate for another 1 hour. Repeat this rolling and folding two more times (for a total of three turns), chilling in between each turn.
- Once complete, the dough is ready for shaping into your desired form, whether it be croissants, Danish pastries, or another flaky delight!
Creative Variations and recipes to Elevate Your Baking Experience
Chef’s Notes
For success with laminated dough, remember that temperature is key. Ensure your butter is cold and pliable, preventing it from melting into the dough. If you find the dough’s texture becoming too sticky during rolling,a light dusting of flour can definitely help. Moreover, feel free to explore flavor additions such as herbs or spices in the dough, or experiment with fillings like fresh fruit or nuts for unique pastries.
Serving Suggestions
To serve, dust your freshly baked pastries with powdered sugar or glaze them with a simple syrup for added shine. pair with a rich chocolate sauce or a side of homemade fruit compote to enhance your presentation. Enjoy alongside a cup of freshly brewed coffee for a delightful start to your day!
| Nutritional Facts | Per Serving |
|---|---|
| Calories | 200 |
| Protein | 3g |
| Carbohydrates | 24g |
| Fat | 10g |
Q&A
Q&A: master the Art of Laminated Dough - A Step-by-Step Guide
Q: What exactly is laminated dough?
A: Laminated dough is a magical creation of the baking world! It’s a process that involves folding layers of dough and butter together multiple times to create a flaky, airy pastry.Think croissants and puff pastry-the result is light, crispy goodness that elevates any meal or treat.Q: Why should I master laminated dough?
A: Mastering laminated dough opens a treasure chest of culinary delights! Whether you’re craving buttery croissants for breakfast or a flaky pastry for dessert, the skills learned from this process are transferable. Plus, there’s nothing quite as satisfying as creating pastries that look impressive and taste divine, all from your own kitchen!
Q: What are the essential ingredients needed for laminated dough?
A: For a solid laminated dough, you’ll need all-purpose flour, salt, water, and yeast for the base dough, along with a generous amount of cold, unsalted butter for the layers. Each ingredient plays a crucial role in creating that signature flakiness and flavor. Remember, quality matters-opt for fresh, high-grade ingredients where possible!
Q: Is the process of making laminated dough complex?
A: While it may seem daunting at first, making laminated dough is all about patience and practice. The basic techniques involve mixing, chilling, rolling, and folding, which you repeat several times. Take your time, and don’t rush the chilling process-it’s vital for that perfect flaky texture!
Q: Can I experiment with flavored laminated dough?
A: Absolutely! Once you’ve got the basics down, feel free to get creative. Infusing the dough with herbs, spices, or zests can lead to fantastic flavors. You can also try integrating layers of chocolate, almond paste, or fruit preserves into your pastries to create a delightful surprise in every bite!
Q: How do I know when the dough is ready to be rolled?
A: A well-prepared dough will be elastic yet somewhat firm, with a smooth surface. After resting in the fridge, you should be able to roll it out effortlessly. If the dough springs back a little, it’s a sign that it needs a bit more resting time. Remember, a relaxed dough is your best friend.Q: What common mistakes should I avoid when working with laminated dough?
A: The most common mishaps include using butter that’s too warm (which can cause it to ooze out and make a mess) and rolling too thick or too thin. Also,be mindful of the temperature in your kitchen,as warm conditions can affect the dough’s texture and handling. If you’re in a warm surroundings, give your dough extra chill time!
Q: How can I make sure my pastries turn out perfectly flaky?
A: The secret ingredient is patience! Ensure each layer of butter is well-incorporated and evenly distributed throughout the dough. When rolling and folding, aim for a consistent thickness to maintain uniformity. The colder your dough and butter remain,the flakier the end result!
Q: What can I do with leftover laminated dough?
A: Don’t let it go to waste! Leftover dough can be transformed into delightful bites. Think of mini pastries, palmiers, or even turnovers filled with your choice of sweet or savory fillings. The possibilities are endless-just let creativity lead the way!
Q: Are there any tips for storing laminated dough?
A: Yes! You can store your laminated dough in the refrigerator for a couple of days before using it. For longer storage, wrap it tightly in plastic wrap and freeze-it can last for up to a month. When you’re ready to use it, thaw in the refrigerator before rolling out.
With these insights, you’re now armed with the knowledge to embark on your laminated dough adventure.Happy baking!
Key Takeaways
As we draw the curtain on our journey through the delightful world of laminated dough, it’s clear that this culinary art form is not just about technique-it’s about unveiling a symphony of textures and flavors that elevate your baking to new heights. From the initial layers of butter and dough to the final, flaky masterpiece that emerges from the oven, mastering laminated dough is a testament to patience, precision, and passion.
Whether you’re a seasoned baker or just beginning to explore the depths of pastry, remember that every batch you create is a step closer to perfection. embrace the process, make mistakes, and celebrate your triumphs; each folding and rolling session is an opportunity for growth and creativity.
So, as you gather your ingredients and preheat your oven, know that you are embarking on a delicious adventure. Let your creativity run wild-experiment with flavors and fillings, and soon you’ll find that the possibilities are as limitless as the buttery layers of your dough.
Now, take a deep breath, roll up your sleeves, and let the magic of laminated dough transform your baking experience. Happy baking, and may your pastries always rise to the occasion!